

Garage Vary Nostalgic Tail Lamp kit - installed.
Your Shopping List
- The Garage Vary tails kit! - Many places online sell this kit. Rspeed, Rev9, etc. This kit was discontinued at one time, but as of late 2010, it seems they're being made again.
- A drill and bits. - Because you'll have to drill holes for US-spec license plates.
- 4-6 small washers - To make the trunk lock flush with the panel.
- ~4 feet of 20-22 gauge wire in two colors. I used red and black since I had that around.
- Two female disconnect terminals, a ring or fork terminal, and a single vampire tap.
- A nice crimping tool, a wire stripper, and wire cutters.
- Electrical tape
Frequently Asked Questions
- How do I wire the brake and signal lights?
You just plug them in! Except for the reverse light (missing from your new round lights), the lights used by Garage Vary are completely plug-and-play for the NA Miata. - How do I wire the reverse light?
You'll tap into the driver's side light harness. The red/green wire in the top-middle position on the stock rear light harness is the one you want. This will connect to the red wire on your small Daihatsu reverse light. The black wire will be grounded somewhere inside your trunk. Use a ring terminal for this. There are lots of bolts to choose from. - I have to drill my new Japanese fiberglass? Really?
Yeah. A bit of a bummer. But it's not very difficult. And you don't have to worry a ton about how the holes look since you are putting your plate in front of the drill work. Just go slow, measure many times, and use sharp drill bits. - My panel sticks out on the driver's side. What gives?
You may have mounted your reverse light backwards. The bulb sticks out at an angle. One way results in a nice, flat GV panel. The other way makes the panel stick out a bit on the seam under the tail light on the driver's side. I'll repeat this again later, but the reverse light guts should point toward your license plate. - How do I know if I have a real Garage Vary panel?
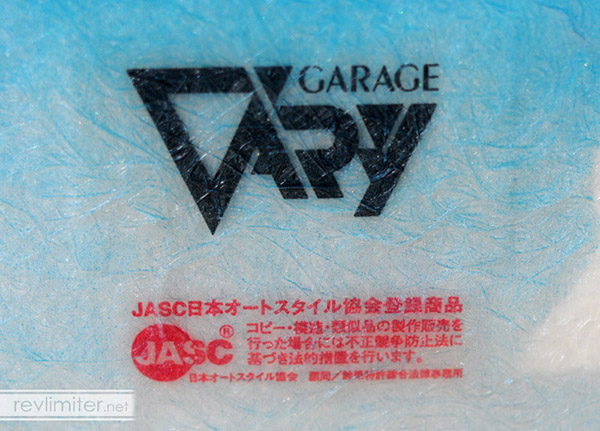
Real GV panels have a stamp on the inside center. If yours doesn't have it, you have a knock off.
OEM Tail Removal

Before you start, you should know one thing: the OEM rear finish panel (the thing behind your plate) is extremely fragile. Some will self destruct the moment you begin removing it. Others are a little more resilient. Either way, you should treat it like a bomb if you have any interest in saving it for possible reinstallation later.
The tail lights are held in by four nuts. Grab your 10mm socket and go to town. They should pull out with a slight pop when you get all the bolts removed.
Also remove the rear carpet panel covering the back wall of your trunk if so equipped on your car. Mine was held in by six plastic retainers. Set this aside for later.

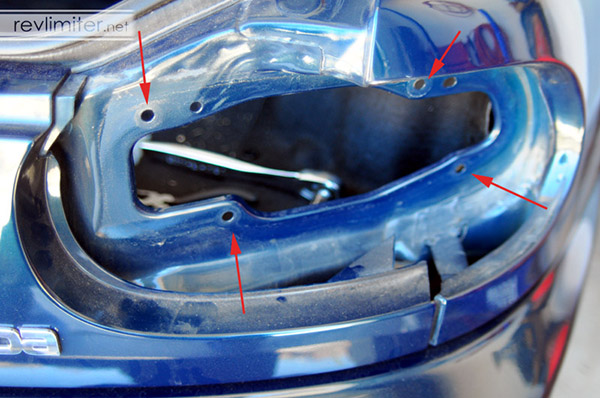
These two bolts and one plastic retainer hold on the rear finish panel at both sides. The plastic piece can be removed by squeezing it with pliers as you shove it out. The bolts are the same 10mm heads that held in the tail lights.

Most owners will have no problem finding this. Those with stripes might. I, for example, had vinyl covering this retainer. Took me many minutes to find this.

Arrows point to all of the places this panel was originally attached. You'll notice I've removed my license plate lights. You do not need to do that. I was just removing everything I could find.
While you're in there. Give everything a good cleaning. There's probably a bit of dust after 15+ years.
Installation

Test fit your GV panel. No mounting necessary, just hold it up by hand. And then check out your lock cylinder and see if you need to space it out a bit to make it flush against the fiberglass. Mine needed two washers on either side to push it out enough.

If you don't read Japanese, this is probably the reason you're looking at this page right now. These small panels are impossible to figure out. I have Tim of CR.net to thank. If he'd not figured this out, I'd still be staring at the parts with a stupid look on my face.
You're looking at the back of this small fiberglass panel. It will be mounted on the passenger side. The black insulation goes between the body and the fiberglass. The small bolts were included with the kit.

That is how it should look. The small hole on the bottom will give you some idea of which way to point this small panel. The driver's side is the mirror image of the passenger side.

This is how it looks from inside the trunk. You don't need to go crazy tightening the small bolts. Finger tight is good enough. I used a 1/4" drive ratchet to snug them up just a bit more. You just want to keep some moisture out of your trunk.

And here are both small panels installed. They're really not very complicated. But when looking at all-Japanese instructions with no illustrations? Ouch. They become pretty difficult to install.

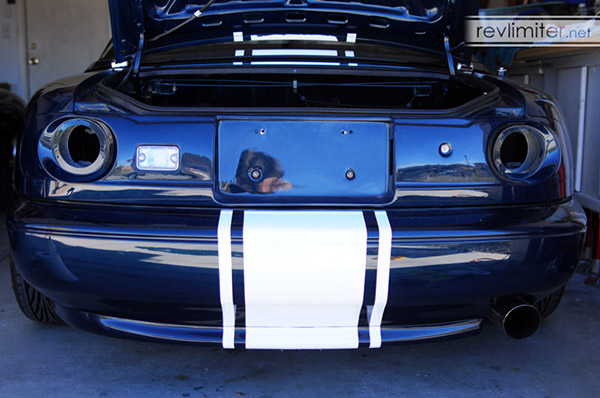
Drill time. Measuring where to drill is difficult. I stuck some blobs of tape to the stock plate mounting holes on the Miata body and then pressed the GV panel against them. This got me in the ballpark. Then I drilled from the back. The front doesn't look extremely beautiful, but it is hidden by the plate. And a layer of vinyl for Sharka.
Just go slow. Make a pilot hole and test fit again. Once you're sure of where to drill, make the big hole.

No wiring nor any instructions that I could piece together came with the kit. So, here's my take. The red wire is the power wire. Crimp a female disconnect to that. The tab on the body is how you ground this little light. A black wire and another female disconnect complete the wiring. A couple of feet each is plenty.
As stated above, the red wire connects to the red/green wire on the top-center of your stock tail light harness. Use a vampire tap for this. The black wire should ground to the body somewhere on the inside of your trunk.

This is the final mounting position of the reverse light. Notice how I bent the tab on the ground wire. This helps prevent interference when mounting the GV panel. If you mount the reverse light so that the bulb points the other direction (toward the outside of the car), you will have panel alignment problems under the driver's side brake light.
Bolt the reverse light to the Garage Vary panel and then install the panel! Mine came with double sided tape already attached to the rounded side seams. You may have to add tape to yours. I'd recommend 3M's 5 pound mounting tape.
The panel mounts with the two bolts in the bottom center. And that's it. Make sure you get the panel aligned well before bolting it down. The bolts can cause it to move. But once aligned correctly, you should have almost zero panel gap anywhere.

Finally, you'll mount the tail lights. They just screw into the fiberglass with the included sheet metal screws. And they plug right into the stock Miata tail light harness. It doesn't get much easier than that.
Additional Images

You may wish to add a Mazda badge that somewhat matches the vintage look of your lights. I'm using one from an RX-2.

...and that's it.
Site Navigation


Latest Blog Posts
Mabel
Posted on Sat, 29 Jun 2024 03:42:43 +0000
 Who’s the dog that keeps showing up on the revlimiter Instagram? It’s Mabel, my ACD/Pomeranian service dog.
Read more...
CarbonMiata Vent Window Install/Review
Posted on Sun, 29 Jan 2023 14:57:01 +0000
 After waiting 23 years, there’s finally a pretty vent window kit on the market for the NA/NB Miata. Unfortunately, it doesn’t actually work well.
Read more...
Basement Tour – M Coupe & NB Prototype
Posted on Sun, 28 May 2017 00:17:06 +0000
 The final basement post highlighting the M Coupe and the NB Prototype.
Read more...
Mazda Basement Tour – The Miatas
Posted on Fri, 26 May 2017 23:15:34 +0000
 At last - Miatas! Here's some Miata content straight from the Mazda R&D Basement
Read more...
Mazda Basement Tour – Road Cars
Posted on Thu, 25 May 2017 22:42:34 +0000
 The street-roaming cars of the Mazda R&D Basement. Be warned – there’s no Miatas in this post.
Read more...

Products sold on this site are for Off-road and Competition use only. This website intended solely to provide general guidance on matters of interest for the personal use of the Reader of this Page, who accepts full responsibility for its use. All products as well as information provided "as is," with no guarantee of completeness, accuracy, or timeliness, and without warranty of any kind, express or implied, including, but not limited to, the warranties of performance, merchantability, and fitness for a particular purpose.