
The finest Retro Hazard Switch IN THE WORLD!
Your Shopping List
- A genuine revlimiter.net Retro Hazard Switch Gauges. - You can buy them right here on this site! Other switches may be of lesser quality or not compatible with the steps below. Don't settle for anything but the best!
- Extra spacer washers - These come with your switch. These let you space the front plate out perfectly flush.
- A #2 Phillips screwdriver. Every screw will be removed by this.
- A long flathead screwdriver. The tool of choice for removing eyeball vents.
- OPTIONAL: Powder-free gloves - These come with your switch. You can get a better grip on things and you'll have less finger prints to wipe off when you're done.
Frequently Asked Questions
- Does this work for all NA Miatas?
Sorta. At the time of this writing, my Retro Hazard Switches are only designed for the non-airbag dashboard that came on the NA6 (89-93) Miatas. Very shortly, there will be a plate specially designed for the NA8 and this FAQ question will go away. But aside from the plate difference, the install is the same for all NA cars. - Gloves? Really?
Yeah. I like to keep a clean car, so I ship a set of gloves with the switch. You don't have to wear them. They just help keep the front plate clean during the install. - Can I get a special plate in red/white/bronze/rainbow anodize?
No. I get these anodized in bulk. The cost for a single plate dipping would be more than twice the sale cost of the entire hazard switch. It's brushed aluminum or black anodized for the time being. - Can I get the labels in green/blue/tweed?
No. Sorry. I also buy the labels in bulk. I have 1000 of them in my shop. There won't be different label color options for quite a while. - Some other shop sent me to this page. Is it cool if I use the info here?
Well, sure! The thing I enjoy most is helping out my fellow Miata enthusiast. However, I'd greatly appreciate it if you would drop me a note and tell me about these other manufacturers who are ripping off my hard work. This information doesn't write itself.
Center Trim Removal
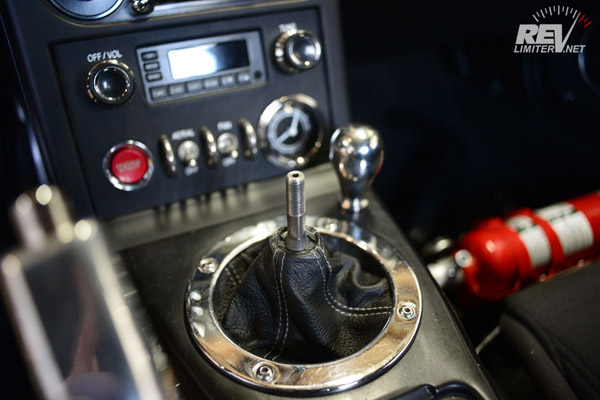
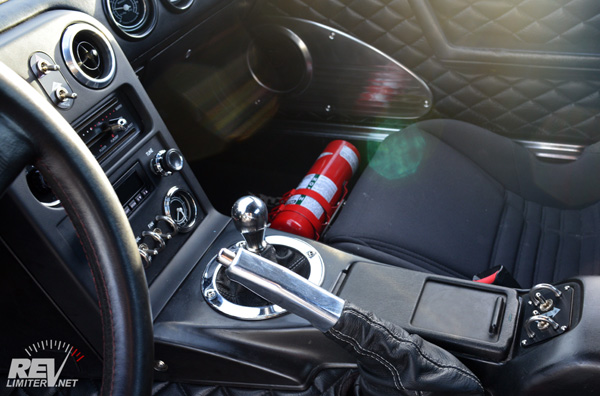
Remove your shift knob. Most of them just unscrew. If you've got a funky one with a set screw and collar, chances are you probably know how to remove it.
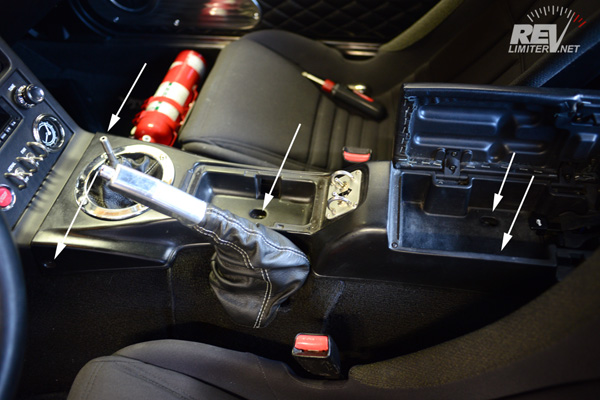
The center console is held in place by five screws. They're shown here in white arrows. I like throwing them in my ashtray for safe keeping after removal.
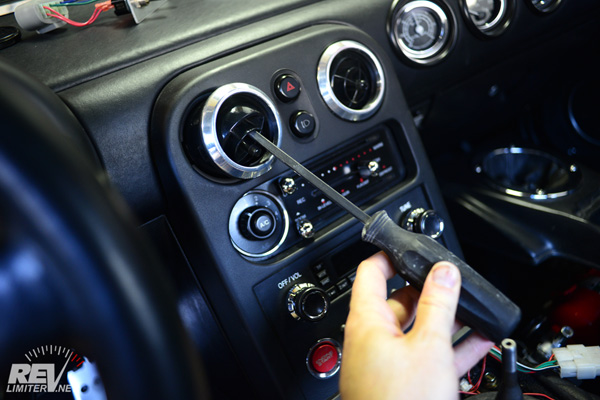
This is the easiest and most efficent way of eyeball vent removal. You use a long flat screwdriver. Stab it in the center of the eyeball vent and angle the handle down toward 5 o'clock. Then just pull toward you. The vent magically comes free. This is far easier than using a rope or wire to pull the vent out.
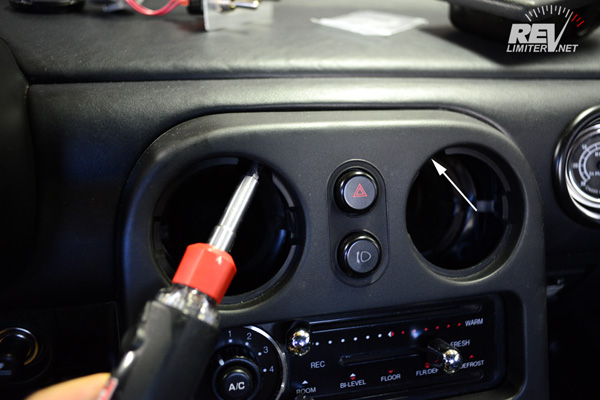
Three screws hole the tombstone in place. Two are hidden above the eyeball vents in the indicated corners. They like to fall into the dark nooks of the dash, so be careful when removing. I always have one finger on the screw as I'm about to remove it.
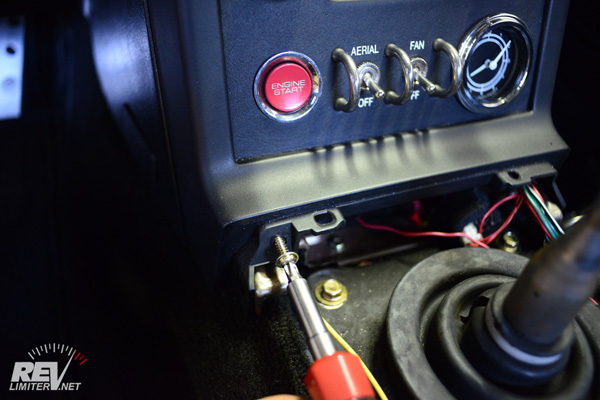
One final screw and the tombstone is ready to pop free.
Hazard Switch Install
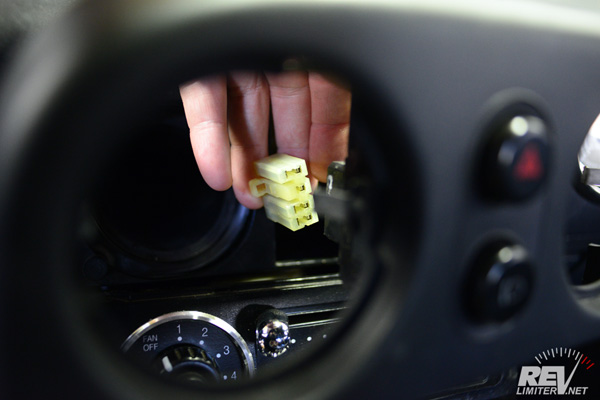
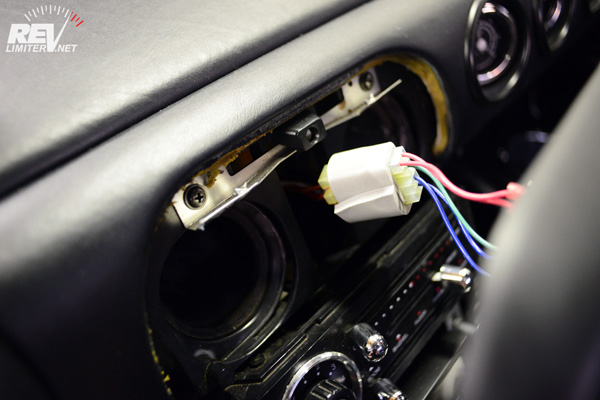
Unplug your OEM hazard switch from the harness. The wiring is pretty short, so don't yank. Just work with what the factory gave you.
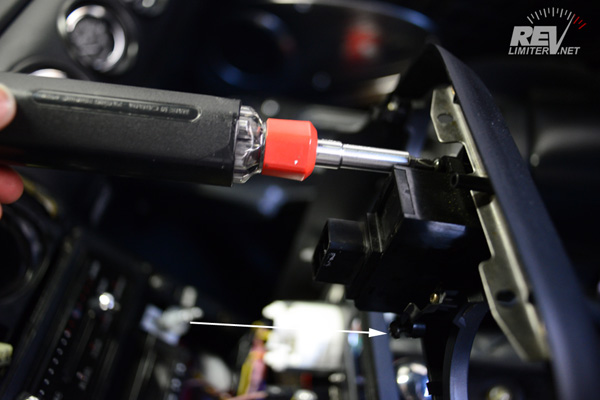
The OEM switch is held in place by two screws. Out they come! They won't need to be reused.
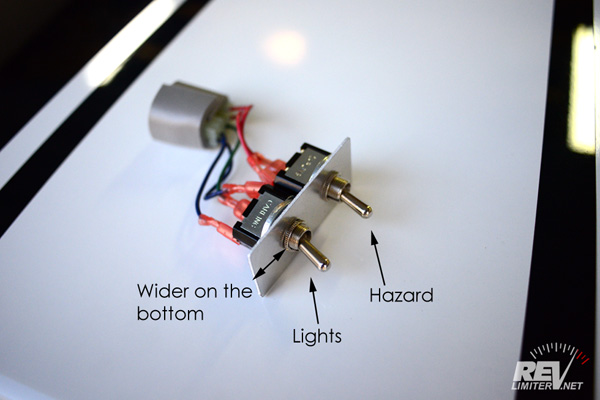
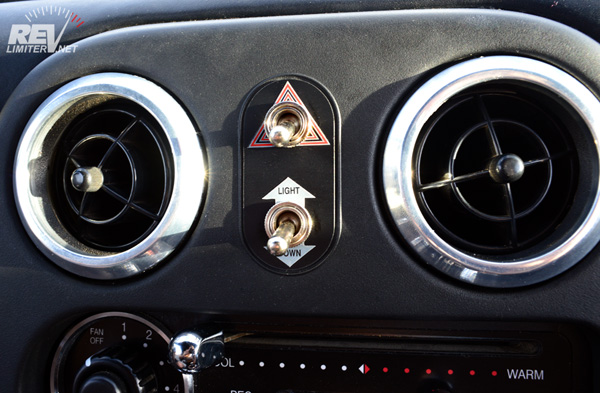
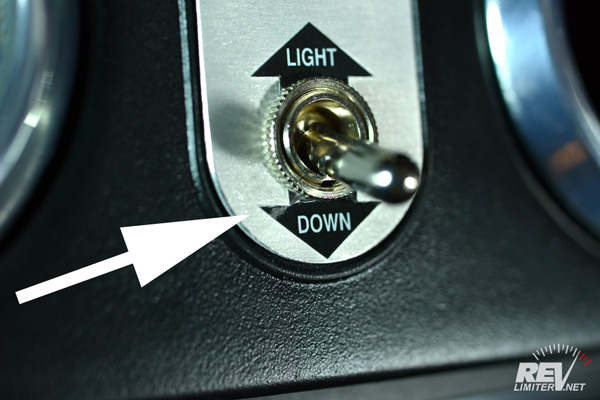
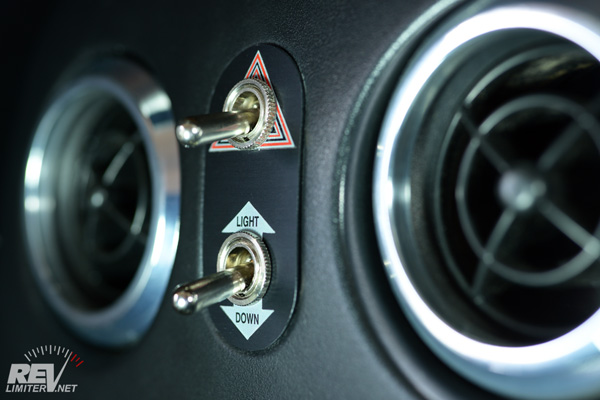
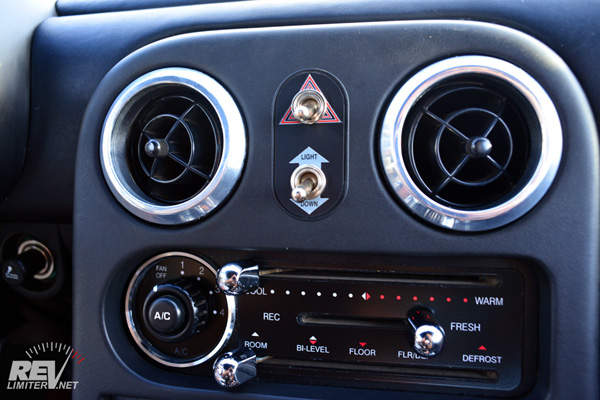
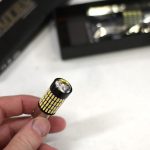
This is probably not necessary, but it's nice to be thorough. This is the orientation of your new Retro Hazard Switch. The backing plate is longer on the bottom to allow it to rest on the tombstone plastic. The switches are oriented so that down is off. The headlight motor switch is on the bottom and has three wires going to it. The hazard switch is on the top with two wires.
Start with one switch or the other and install one of the knurled nuts over the switch shaft. Don't tighten it too much at first. You'll want to slide and center your switch plate. You also want to figure out which spacer washer to use.
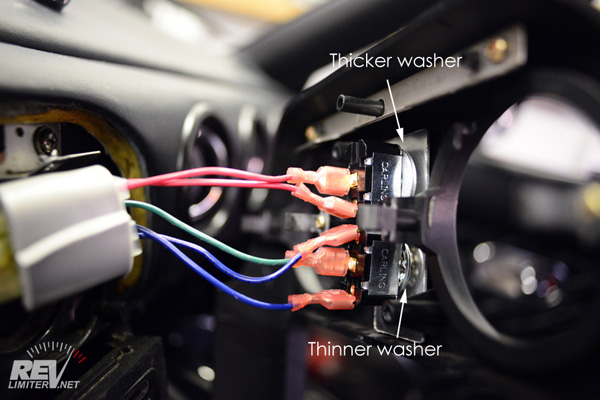
Your switch was shipped with a few options for spacer washers. The thick solid ones are installed. A pair of thinner lock washers is shipped in a bag. Or, as a third option, you can remove the washer.
This allows you to space the switch body forward or back so that it is flush with the knurled nut and no threads are sticking out. It might seem like an insignificant detail, but the overall look is much cleaner with a flush switch. Sharka took a thick one on top (hazard) and a thin one on bottom (headlight). My photo set tombstone uses two thick washers.
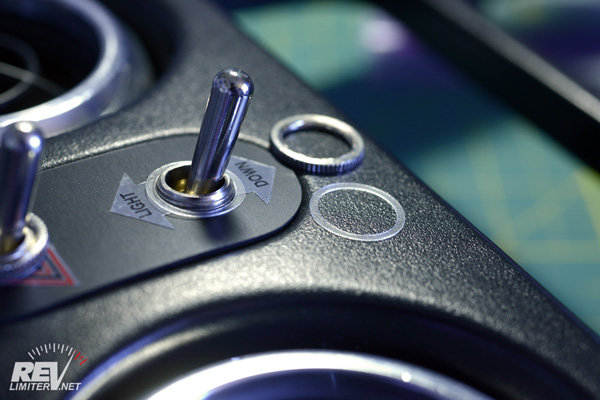
Slip one of the included teflon washers over each toggle switch before putting on the knurled nut and tightening. This small, thin washer doesn't seem like much, but it protects both the label and the metal plate from being damaged by the knurled nut.
Be careful tightening the headlight nut. The label has an edge that lies inside the nut radius. That makes it more likely to tear if you go wild tightening it down. Don't worry - you can get the nut tight. Just don't go overboard. I've tested a few to destruction. All of the labels have torn on the left side. If you used the teflon washer, you shouldn't have to worry very much about tearing the label.
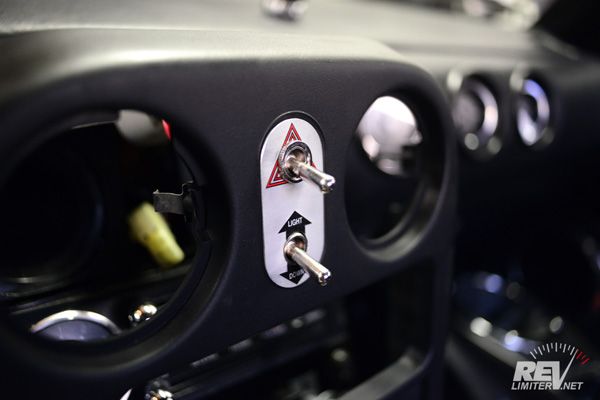
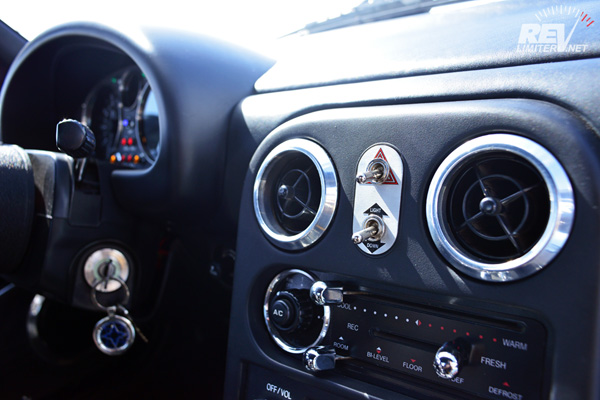
Plug the new switch into the wiring harness. TA-DA! You're done. Button up the car and go post photos for everyone to see.
Additional Images
The brushed aluminum version.
The NA8 version in black anodized.
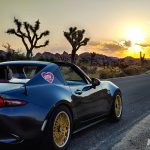
And the black anodized NA6 installed in Sharka. This is my favorite.
A perfect match for the Retro Window Switch
Site Navigation
Latest Blog Posts
CarbonMiata Vent Window Install/Review
Posted on Mon, 30 Jan 2023 01:47:44 +0000
 After waiting 23 years, there's finally a pretty vent window kit on the market for the NA/NB Miata. Unfortunately, it doesn't actually work well.
Read more...
Period-Correct 90s Rear Speakers
Posted on Mon, 11 Oct 2021 02:12:26 +0000
 Sharka's rear package tray now holds more than just a rollbar. A set of 90s speakers is the next upgrade for the little blue and white boi.
Read more...
GV Tail Light Upgrade
Posted on Tue, 28 Sep 2021 02:05:06 +0000
 TLDR; LEDs are brighter, who knew?
Read more...
Mona Visits Joshua Tree
Posted on Sat, 26 Jun 2021 03:21:12 +0000
 Mona checks out the curious multi-armed residents of Joshua Tree National Park
Read more...
KINOD 15
Posted on Sun, 20 Jun 2021 22:49:33 +0000
 Mona and I made the pilgrimage to SoCal for the 15th Anniversary KINOD Event.
Read more...

Products sold on this site are for Off-road and Competition use only. This website intended solely to provide general guidance on matters of interest for the personal use of the Reader of this Page, who accepts full responsibility for its use. All products as well as information provided "as is," with no guarantee of completeness, accuracy, or timeliness, and without warranty of any kind, express or implied, including, but not limited to, the warranties of performance, merchantability, and fitness for a particular purpose.