
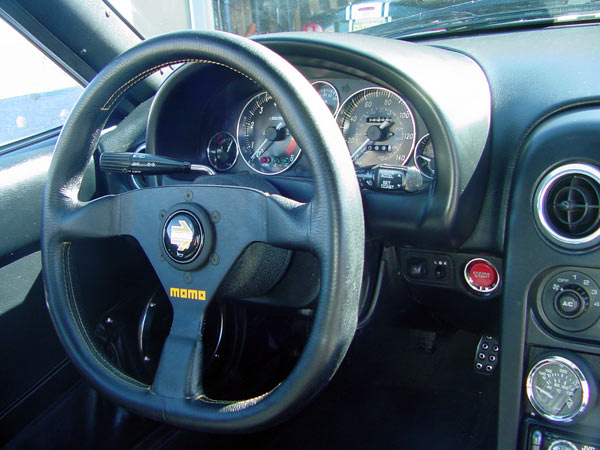
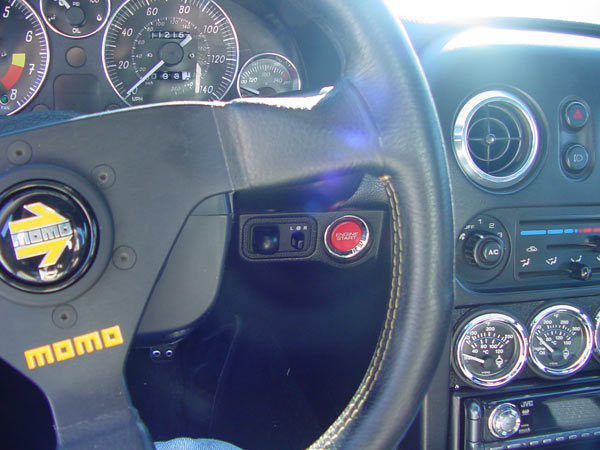
S2000 start button installed in my Miata
Start Button How-to History
About the middle of 2001, I decided my Miata needed a starter button. I'd seen several installs written up online, but they all used regular old big red buttons. That didn't really appeal to me, till I saw the S2000 start button. It was big, red, came with a chrome bezel, and best of all, was cheap online. I bought it and wrote up some install steps for Miata.net. Then I got spammed for 5 years with both spam and questions like "i cant git my car 2 start hoiw do i wire the relay and whats that smoke smell i smell?" So. Here it is. The updated Honda S2000 Start Button install tip sheet from Miata.net and Revlimiter.net.
If you've got a 2nd generation Miata (the NB) and want to wire up the S2000 start button, I've got a page just for you! The revlimiter.net NB S2000 Start Button Install is nearly identical to this one, but with NB specific directions.
Your Shopping List
- One Genuine Honda S2000 Starter Button - HandA-accessories.com ref number 609. I'd recommend HandA-accessories.com for as a source for the button due to their extremely low price.
- One SPDT relay at 30amps/12 volts - Parts Express part number 330-070. That's a Single Pole Double Throw relay. You can find one here, as my #1 source of questions is "where do I get the relay?" I'd suggest ordering two (one spare).
- One 5-pin relay socket - Parts Express part number 330-075. Like the relay, this is also available here.
- One 3.5in internal computer power cable - Cables To Go part number 03165. You're basically looking for the type of power connector that your computer's 3.5" floppy drive (the old A: drive) uses. You can find a Y-adapter here. Just cut off one of the small connectors.
- ~Five feet of 12 gauge wire, and about the same amount of 18 gauge wire in your choice of colors.
- One large 12 gauge ring terminal to ground the relay to your steering column.
- ~Six male and six female 12 gauge insulated bullet-style crimp connectors.
- ~Three 22-26 gauge vampire taps to tap your handbrake and cigar lighter.
- ~Six insulated 18 gauge spade style crimp connectors for starter button wire connections.
- A nice crimping tool, a wire stripper, and wire cutters.
- Electrical tape
- Dremel tool with several small grinding attachments
Hand Holding / FAQ
Please don't take offense at the section title. This part may come in handy for you if/when you have problems. It is the sum of my knowledge of installing these buttons. If you don't find an answer to your question here, then I probably have no idea whatsoever.
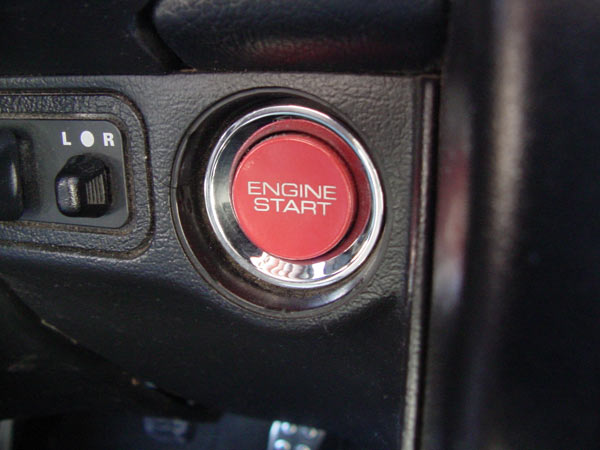
The Button: I have only installed the Honda S2000 start button. I've never done the ignited, the KG Works, any industrial buttons, or anything else, so I have no idea how they work. Sorry. To use these instructions properly, you need a Miata and an S2000 starter button from Honda. You can find this button for about $45 from your local Honda dealer, or for $35 from HandA-accessories.com
The Relay: The #1 source of questions is this relay. The first thing you should know, is that an SPST relay (single pole, single throw) won't work. The use of a SPST relay will result in your wipers, heater, and various other things on the IG2 circuit not working. "But wait, my 5 prong relay doesn't work either!" This is one I've heard many times. They sell SPST relays with 4 prongs and 5 prongs, usually with two 87 outputs. This will not work. You need an SPDT relay, with 5 prongs (that's an 87 and an 87a). You can find this relay at Parts Express, as I linked above, or very rarely at local auto parts stores such as Autozone. Keep in mind, that you're very likely to find the 5 pole SPST relay at these local shops.
The Car: My instructions are specific to the 90-97 Mazda Miata. I have no idea how to wire up your (insert Make here) (insert Model here) ignition system. I'd recommend a Haynes manual, as they have excellent wiring diagrams in the back. Good luck!
How it works: Once you've got this hooked up as I outline in the instructions, you'll only be able to start your car with the S2000 starter button. Turning the key to the "start" position does nothing. "How do I hook it up to allow both to start my car?" Honestly, I don't know. I've never tried to redo the diagrams to allow both the key and the button to start the car. "Is it easier to steal the car now?" No. The S2000 button just replaces the "Start" position of your key switch. You still need the key to start the car.
The Master Diagram: By popular demand, I have created a master diagram of the start button, relay, relay harness, and the factory wiring. This will not make much sense to you at the beginning of the project, but if you keep referring back to it, most of your questions should be answered.

The master diagram: PRINT THIS!
NA S2000 Starter Button Install
Step 1: Get started.
Disconnect the negative cable from your battery. Safety first here. If you're too lazy to disconnect your battery, at least do all your work with no key in the ignition.
Step 2: Remove the lighter.
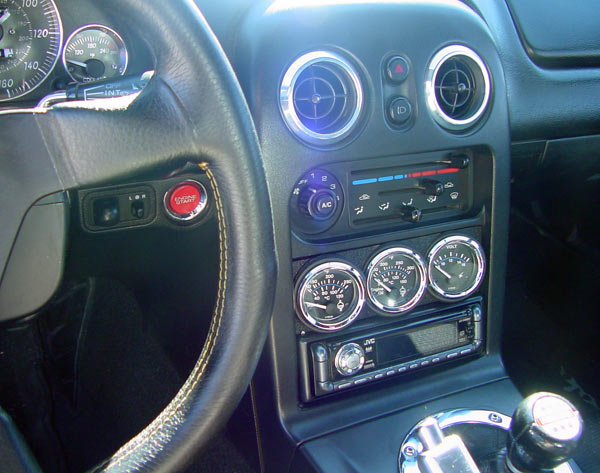
I installed my button in place of the cigar lighter on the NA Miata. You can see the spot in the above photo. If you want to put your button here, continue reading. Otherwise, you're on your own until step 4.
Remove the metal knee guard from under the steering wheel and place it out of the way. Only 2 screws should be holding it in place. Now scrunch down and start feeling around the backside of your lighter. There will be two wires connected to the lighter through one connector which you can easily remove by pulling toward the front of the car. Now, remove the lighter. Get into as good an angle as possible and start pushing on the back of the lighter assembly toward the back of the car. With some work it will pop out the front of your dash. Sometimes it's easy and sometimes it's not. Keep the lighter wires handy and don't cut them off. You use these wires in this install regardless of whether or not you wanna keep your lighter.
Step 3: Mount your start button.
Now that the lighter is out of the way, you'll enlarge the stock lighter hole to fit your S2000 start button. When you're done, you will have enlarged the hole by quite a bit and cut several slots for the button housing. There's really no way for me to walk you through this step. Just take your time. Make a small change, test fit your button, remove it, and then make another small change. If you make the hole a little too big, you can always wrap a little electrical tape around the button body to make the fit tight again. If you make a mistake with the notching, that's a little harder to fix. Try to line things up straight, notch a little, then test fit. Just take your time and hold off on the beer till after you're done cutting up your dash.
Once you're done and your button is in place, give it a few victory presses to make sure the button pops back out again. This is very important. If your hole is slightly too tight for your button housing, the button will bind and not release after you press it. This is bad. You want a tight fit, but not too tight. Once you're done, remove the button again and get ready to wire it up.
Step 4: Wire the button.

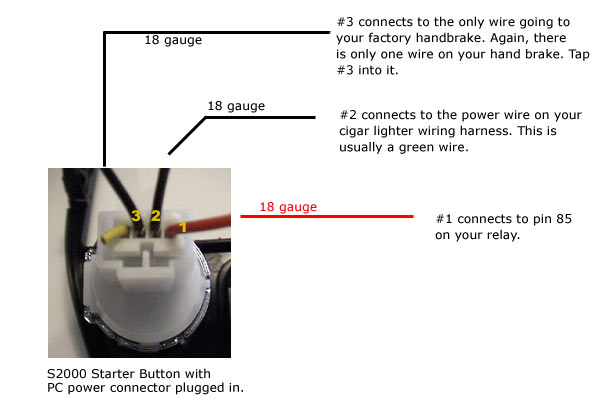
Wiring the back of the starter button
As you can see from the diagram, the prongs are labeled 1, 2, and 3, starting from the right. The lower picture is my original hacked-up starter button housing. It serves only to show which prongs are which. Don't let it confuse you. You'll be connecting #1 to pin 85 on your relay. #2 and #3 provide power and ground for the little light inside the button. We'll get power from the lighter and ground from the e-brake. Why? We use the handbrake ground so that the little "ENGINE START" light will only be lit when the hand brake is in the up position.
Step 5: Wire the relay.

Wiring the relay
Wiring your relay is incredibly easy if you use on of the 5 pin relay sockets that Parts Express sells and I'd highly suggest using one. If you are using it, the following list will be useful.
- Pin 87 - yellow - connects to the blue/black ST wire.
- Pin 85 - black - connects to your red #1 wire on your start button.
- Pin 30 - blue - connects to the red/black IG2 wire on the key switch.
- Pin 86 - white - connects to your steering column ground.
- Pin 87A - red - connects to the red/black IG2 wire going to toward the firewall
When you're ready to wire your relay, locate your bullet terminals and crimp them onto each wire as shown in the above Step 5 diagram. You'll probably need a longer wire for your ground, so crimp about a 12" extension onto your white wire. Finally, connect pin 85 (black) on the relay socket to pin #1 (red) on your starter button's output wire.
Step 6: Modify the factory wiring harness.

Factory wiring harness modification

Step 6: IG2 and ST wire details.
Step 7: Connect your start button.
Final start button connections
Next, connect wire #2 to the power wire for your cigar lighter. This is usually a green wire for 90-97 Miatas, though your color may vary. I'd recommend verifying which is the power wire with your multimeter. Run a lead from your start button wire to this power wire and tap into it. At this point, all three wires on the back of your button should be connected. Wiggle your start button into the mounting hole and connect your power cable to the back of it. Your button is now installed.
Step 8: Plug the relay into the wiring harness.
Refer to the diagrams for Step 5 and Step 6. Notice how the bullet connectors all line up with each other? You're now ready to use them. Connect the lead from 87 on the relay (female) to the end of your blue/black ST wire (male) that disappears into your wiring harness. The female bullet connector on the key switch side of the ST wire remains unconnected. Connect the lead from 87a (male) to the end of your red/black IG2 wire that disappears into your wiring harness. Connect the lead from 30 on your relay (female) to the end of your red/black IG2 wire that terminates in the key switch. At this point, your relay is connected to every wire except the ground. Look up at your steering column and notice the large bolts (12mm if I remember right) on either side. Loosen one of those bolts, slide the fork connector from lead 86 under it, and tighten it back up. If you have a ring terminal large enough to fit around the 12mm bolt, use it. Otherwise, just make sure the fork makes a good connection to ground.
You're now done. There are no more connections to make. You're now ready to reconnect your battery and see if your car starts. Verify that the little light in your button works correctly (when your e-brake is up, the light will be on) and keep in mind that the light is pretty dim, so you won't be able to see it in a bright garage. If everything works, turn the engine off and start putting your car back together. If you're not using insulated spade connectors, you might want to protect your spade connections with a little black tape. Also, either zip-tie or tape your relay up and out of the way. There should be some room between your button and the steering column. Congratulations on your new S2000 starter button! After 5 years, I can safely report that I've never grown tired of pressing it.
Step 9 (optional): Reconnect your cigar lighter
If you want to keep your lighter around, you're not in for more than another 10 minutes worth of work. I chose to hide mine in my center storage console, so that's what I'll describe here. If you want a more convenient location, I'll leave you to figure that out, but the wiring would be the same. Take your center console (which should still be out of the car) and go back to your workbench. Using your dremel or a drill, make a hole for your lighter assembly. I put mine on the front toward the driver's side. As before with your button, be careful and make small changes. Then return the center console plus lighter to the car. Go back under your dash and find the wires which used to connect to your lighter. Using two vampire taps and two different colors of wire, splice into both and run the new wire toward your center storage console. Now splice your factory connector onto the end of your two new wires and reconnect your lighter. You might wanna test it out before you bolt your center console back in place. What did I tell you? Easy!
Additional pictures
Site Navigation


Latest Blog Posts
Mabel
Posted on Sat, 29 Jun 2024 03:13:22 +0000
 Who's the dog that keeps showing up on the revlimiter Instagram? It's Mabel, my ACD/Pomeranian service dog.
Read more...
CarbonMiata Vent Window Install/Review
Posted on Mon, 30 Jan 2023 01:47:44 +0000
 After waiting 23 years, there's finally a pretty vent window kit on the market for the NA/NB Miata. Unfortunately, it doesn't actually work well.
Read more...
Period-Correct 90s Rear Speakers
Posted on Mon, 11 Oct 2021 02:12:26 +0000
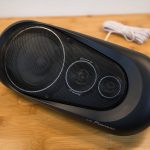 Sharka's rear package tray now holds more than just a rollbar. A set of 90s speakers is the next upgrade for the little blue and white boi.
Read more...
GV Tail Light Upgrade
Posted on Tue, 28 Sep 2021 02:05:06 +0000
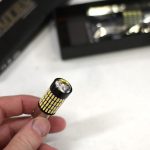 TLDR; LEDs are brighter, who knew?
Read more...
Mona Visits Joshua Tree
Posted on Sat, 26 Jun 2021 03:21:12 +0000
 Mona checks out the curious multi-armed residents of Joshua Tree National Park
Read more...

Products sold on this site are for Off-road and Competition use only. This website intended solely to provide general guidance on matters of interest for the personal use of the Reader of this Page, who accepts full responsibility for its use. All products as well as information provided "as is," with no guarantee of completeness, accuracy, or timeliness, and without warranty of any kind, express or implied, including, but not limited to, the warranties of performance, merchantability, and fitness for a particular purpose.